Workflows
The inbound receiving workflow in a 3PL

Inbound receiving in a 3PL WMS runs from the expected receipt through check in, count and inspection to release to stock, and it is where the records begin. Whatever is wrong at the dock tends to stay wrong in every step after it. So this page walks through the inbound flow as a WMS handles it, one stage at a time, and points out what the system should capture and what a person has to decide.
The examples use a hypothetical client who sells pet accessories. Every figure is invented.
Stage 1: the expected receipt
The client tells you a delivery is coming: which items, how many, which carrier, roughly when. In the system this becomes an expected receipt.
The record should carry the client, the item codes, quantities, the unit each quantity is counted in (cases or pieces) and any reference number such as a purchase order.
What the system does: it creates a document that the dock team can check against.
What a person decides: whether the delivery is accepted at all. If the client has not paid or has no agreement for this item, someone has to say no before the truck arrives.
Stage 2: the appointment
For busy buildings, deliveries are given a slot. The slot is attached to the expected receipt, with a door and a time window.
What the system does: shows the day's arrivals in order, so the dock lead can plan labour.
What a person decides: whether a late truck gets squeezed in or moved to tomorrow.
Not every 3PL uses appointments. If yours does not, this stage is simply skipped, and the rest still works.
Stage 3: check-in
The truck arrives. The driver's paperwork is matched to an expected receipt. Someone assigns a door and the clock starts.
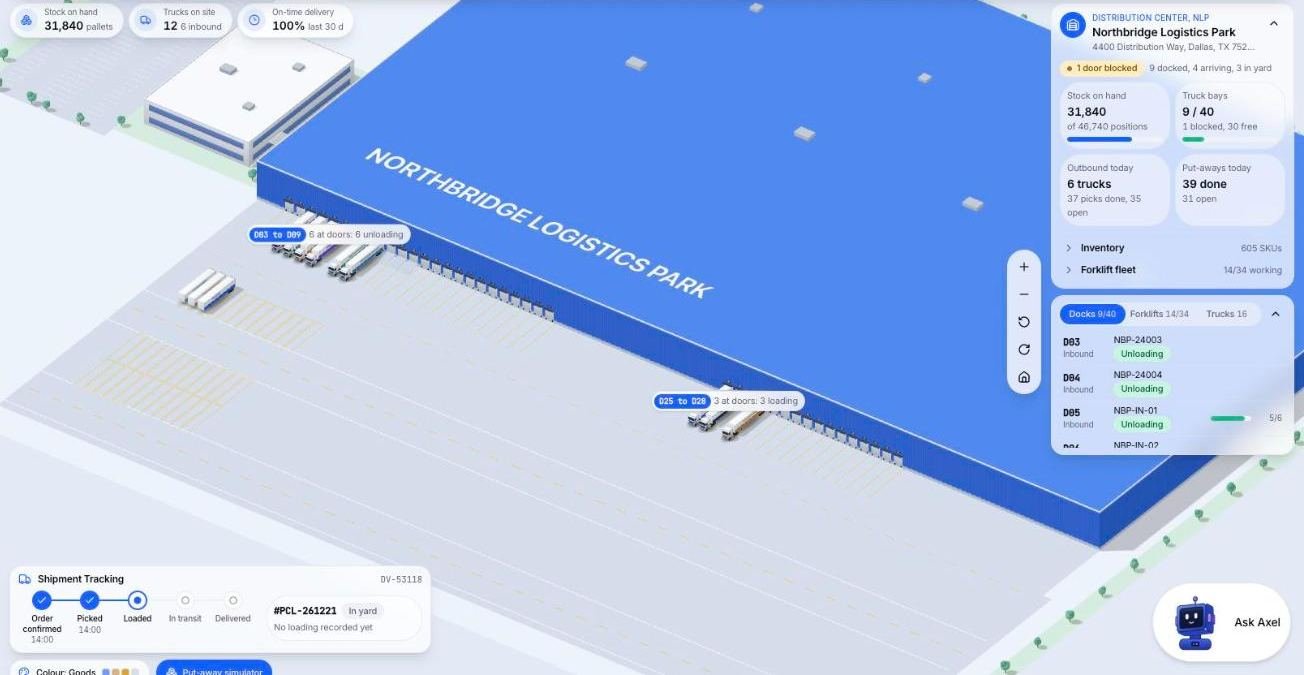
The image below is the yard view from the Microsive demo platform, using demo data, with trailers at the dock doors where check-in happens.
The system should time stamp the arrival, the carrier, the door and the person who checked it in. This is the first piece of evidence if the client later disputes when the goods arrived.
Hypothetical case: the pet accessories client says the delivery was Tuesday, but your check-in shows Wednesday morning. Without the time stamp, you have one person's word against another's.
Stage 4: the count
Now the goods are counted against the expected receipt. There are two common approaches.
Blind count. The receiver does not see the expected quantity and counts what is there. This reduces the habit of agreeing with the paperwork.
Count against the notice. The receiver sees the expected quantity and confirms or corrects it. Faster, but easier to get wrong when tired.
Whichever you use, the count should be entered by scanning or keying against the item, and the system should store who counted and when.
Stage 5: the inspection
Some clients want a check on condition. Others do not care. The system should let you set this per client.
If the receiver finds damage, they record it: what, how much, and a photo if the device supports one. The damaged units are given a status, such as "held", so that nobody can pick them.
Stage 6: the exception path
When the count matches and nothing is damaged, the receipt closes cleanly. When it does not, the system should send the receipt into an exception path rather than forcing a clean close.
An exception record usually holds:
- the item and the expected and counted quantities;
- the type of problem: short, over, damaged or unknown item;
- who recorded it and when;
- the status of the stock involved;
- a note, and a photo if there is one.
The client should be told. How the notice reaches them depends on your setup: an email, a portal message, a phone call logged in the record. The point is that the system shows who was told and when.
This page covers how the system supports the exception path, not the dock routine itself.
Stage 7: release to stock
Counted, inspected stock is released. Release is what turns "on the dock" into "available".
At this moment several things happen together. Inventory increases for that client. Putaway tasks are created. A receiving event is recorded, which may be something you charge for. The client's view of stock updates.
Held stock does not go through release until someone decides what to do with it. This is why a held status matters: it keeps doubtful stock out of the pick queue.
What gets time stamped
Here is a quick list of the moments that deserve a stored time and a name:
- Expected receipt created.
- Truck checked in.
- Count started and finished.
- Exception recorded.
- Client informed.
- Stock released.
- First putaway scan.
If your system holds all seven, you can answer almost any question about a delivery after the fact.
Where mistakes enter
A few places cause most of the trouble.
Unit confusion. The notice says ten, meaning ten cases. The receiver counts ten pieces. Always show the unit next to the number on the screen.
Wrong item code. The client changed a packaging size but kept the item code. Check dimensions and barcodes at receipt when a code looks familiar but the carton does not.
Receiving without a notice. A truck arrives that nobody expected. The system should let you receive it as "unannounced", flag it and tell the client, rather than forcing a fake expected receipt.
Closing early. A receipt is closed as complete while an exception is still open. Make the system refuse that, or at least warn.
What you can set up on day one
A small operation can run a decent inbound flow with only three things: an expected receipt, a count with a recorded user and time, and a held status for problems. The rest can be added as volume grows.
If you are working through how the pieces fit together, the next logical page to read is the one on putaway, which picks up exactly where release to stock ends.
Questions people ask
What are the stages of inbound receiving in a 3PL?
Expected receipt, appointment, check in, count, inspection, the exception path when something does not match, and release to stock. Not every 3PL uses appointments, and the rest of the flow still works without them.
What should a WMS time stamp during receiving?
Seven moments: the expected receipt created, the truck checked in, the count started and finished, an exception recorded, the client informed, the stock released and the first putaway scan. With all seven you can answer almost any question about a delivery afterwards.
What is a blind count in warehouse receiving?
In a blind count the receiver does not see the expected quantity and counts what is there, which reduces the habit of agreeing with the paperwork. Counting against the notice is faster but easier to get wrong when tired.
What does a WMS do when a delivery does not match?
It sends the receipt to an exception path. The record holds the item, expected and counted quantities, the problem type, who recorded it and when, the status of the stock and a note or photo. The client is told, and the system shows who was told and when.
What does release to stock mean in a WMS?
Release is what turns stock on the dock into available stock. If the count does not match, the receipt should go to an exception path instead of closing cleanly.
What can a small 3PL set up for receiving on day one?
Three things: an expected receipt, a count with a recorded user and time, and a held status for problems. The rest can be added as volume grows.
Sources
- No third-party facts, prices or vendor claims are used in this page.